Root Vegetables
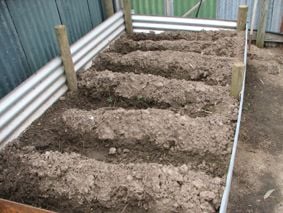
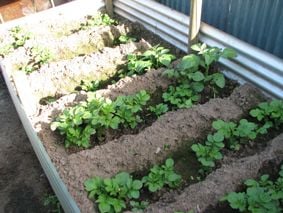
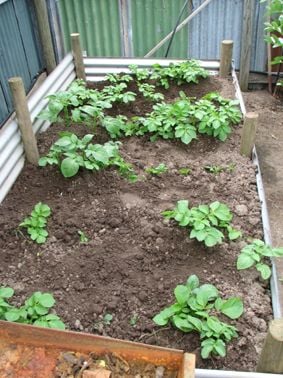
Potatoes
By correct classification, potatoes are solanums (sun loving plants related to tomatoes capsicums and eggplants).
They are on this page because they require less nutrient than others in their family.
Soil texture is important for strong early growth in potatoes.
You might think that potatoes are not worth growing at home because of the space they occupy and because they are a relatively cheap vegetable to buy in the shops .
If you grow them organically they will be free from pesticides and chemical sprouting inhibitors.
They should also be higher in nutrient content than any you can obtain in the shops, so I recommend you set aside an area of approximately 6 metres square for your potatoes.
The potential yield of this area is about 40 kg of potatoes.
Tasmania is fortunate to have the availability of many types of potatoes that can be grown in the home garden.
The varieties that I have had most success with are:
Bintje is an heirloom originating from Holland about the turn of the 20th century.
It grows large oblong shaped tubers with a smooth cream coloured skin.
The flesh is a light yellow. It is a high yielder and stores well. It is ideal for boiling, baking and for salad use.
Nicola is a rich oblong shaped tuber with creamy yellow flesh.
It is great for baking and steaming or boiling.
Kennebec- Originally released in 1948, it was once Tasmania's most widely grown potato.
It produces large oval to round white fleshed tubers.
It is excellent for all types of cooking but particularly special for chips and and crisps.
Kipfler- These are gourmet cigar shaped small potatoes that are especially great steamed or in potato salads.
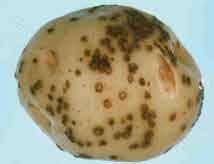
Potato Scab
Potato scab is a superficial skin disease that attacks potatoes if grown in soil that is too alkaline. Do not overuse lime.If you have the ingredients for COF, use only the Guano ,seed meal, kelp and a little dolomite in your fertiliser mix prior to sowing.Always use fresh seed potatoes and rotate the beds to avoid this disease reoccurring.It only superficially affects potatoes and the blemish may be peeled off making the potato quite edible.
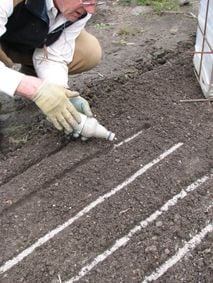
Sowing carrot seed by mixing with sand in a dry drink bottle. This gives a more even distribution of the seed.
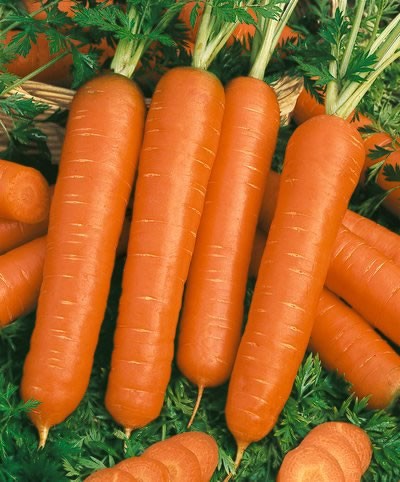
Scarlett Nantes carrot
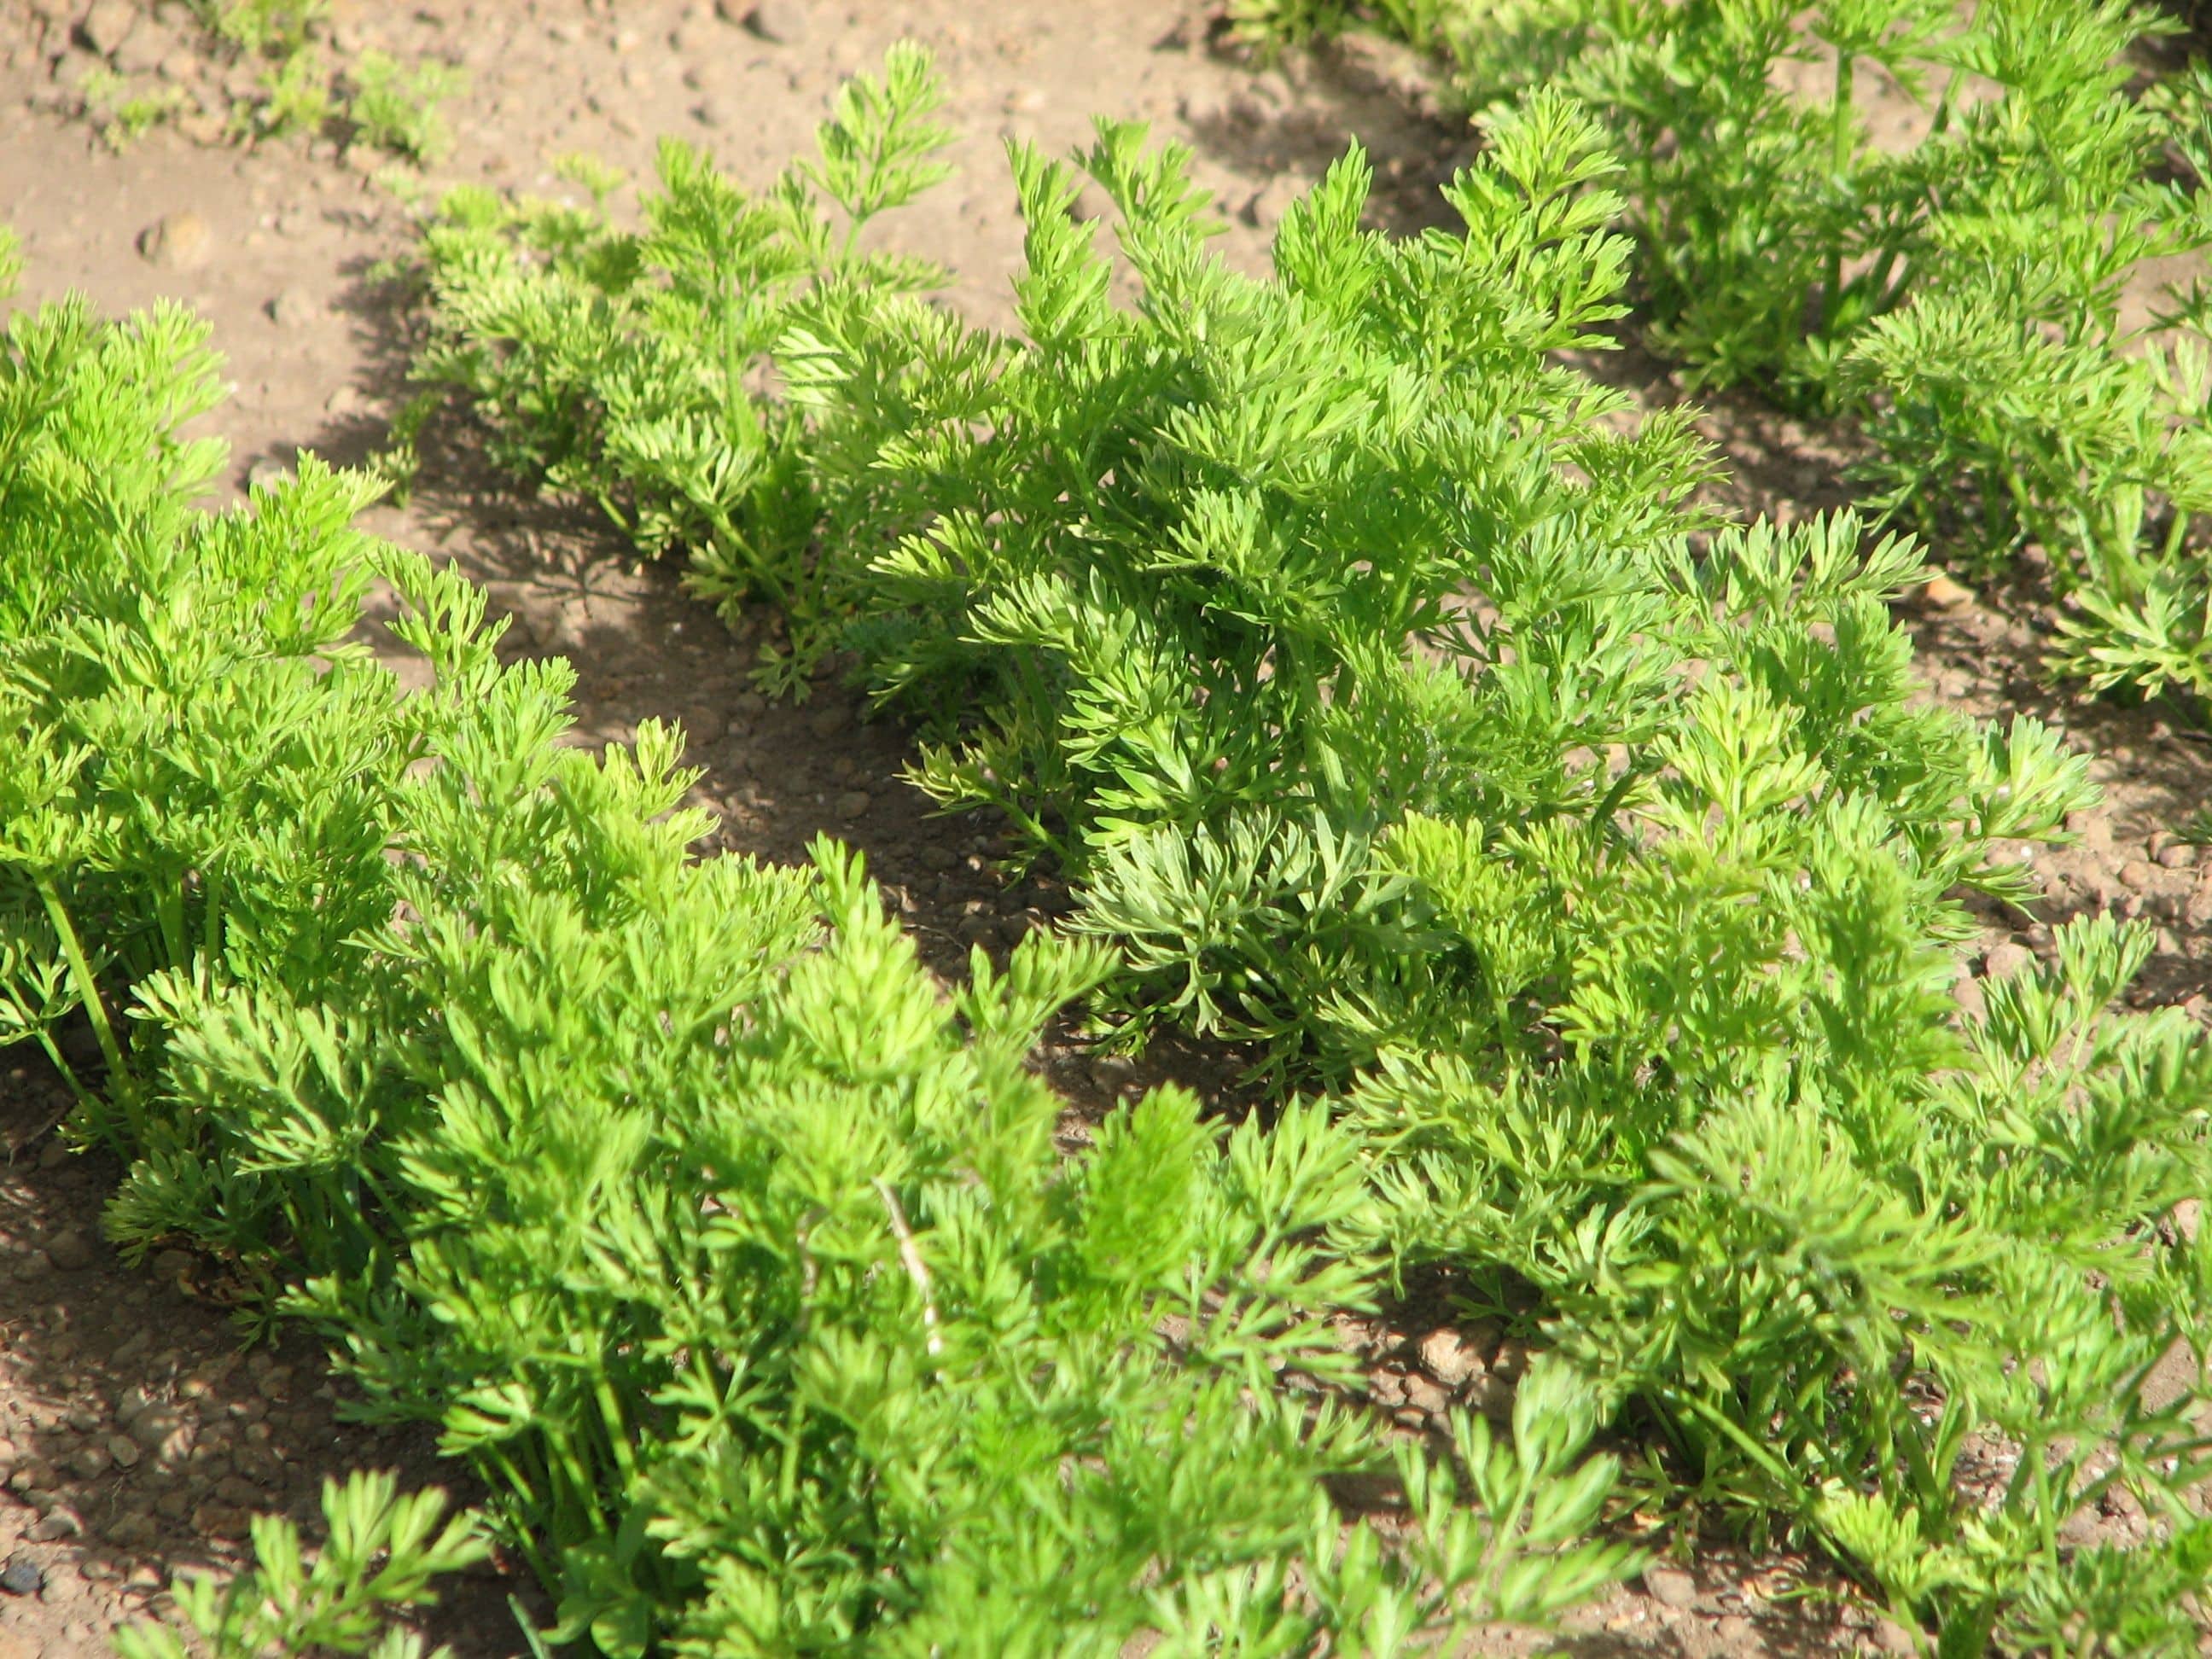
Carrots
Carrots can produce amazingly high returns per square metre.
The only difficulty is that they are slow to germinate, often taking from 12-14 days to sprout.
The small seeds must be shallowly sown where they are at risk of the soil drying out.
A thin layer of compost raked over the finely prepared soil is a good idea as this helps to retain the soil moisture and prevent the carrot seed from drying out.
Pushing the rake handle into the topsoil will also aid in preserving the soil moisture to germinate the seed.
To aid with the even sowing of the seed I mix my seed in a soft drink bottle with coarse sand or finely sieved compost in warmer weather.
I then use this to sprinkle the seed and sand into the rake handle impressions I have made in the soft soil.
I then use my thumb and pointer finger to fold the topsoil over the seed/sand mixture and water this well.
If there is a danger that you cannot water this each day, try soaking a piece of hessian and lay this over the carrot seedbed to keep the surface moist.
You will need to raise it after 14 days so that the emerging carrots are not spindly in their search for the light.
Carrots are best grown in soil that has not been freshly fertilised as their roots will fork if they encounter strong nitrogen fertiliser.
Grow them on soil that has previously grown a brassica crop such as cabbages or cauliflowers.
There will be enough nutrient left from this crop to supply the carrots during their growth cycle.
Dig in plenty of compost to make the soil very friable as carrot roots need to penetrate very deep and then fill out as they grow.
They germinate best in the cooler months of Spring and are best sown in late September.
As the weather warms the germination of the seed becomes more difficult as the soil dries out quickly.
Scarlet _nantes_carrot
I have had excellent success with Scarlet Nantes, a French heirloom dating back to 1855.
It is a reddish orange, cylindrical almost core less variety, which provides crisp, sweet roots to 17cm with excellent flavour.
It is great for salads or as a cooked carrot. It contains the highest number of amino acids found in nutritional research.
The seed can be readily obtained from The Lost Seed company in Tasmania http://www.thelostseed.com.au
At first the carrot seeds appear to grow very slowly.
It takes 5 or 6 weeks for the seedlings to grow to a reasonable size.
In fact, the carrot is establishing a root underneath the ground.
After week eight the carrots fill very rapidly and by week 10 you should be able to eat the thinnings.
It is important that you keep thinning the carrots so they can develop strong fleshy roots.
Crowded carrots will never grow very large.
There is nothing like the flavour of home grown carrots. You will want to grow them all year.
I manage to make 3 sowings of carrots per year.
The first is made in late September and keeps us in carrots all Summer.
The second sowing is made in mid - late December and provides carrots for the Autumn.
I then make a further sowing in early February which lasts over the winter.
Covering these winter maturing carrots with extra soil is a good idea to keep mice from gnawing on the tops.

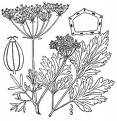
Parsnips
Parsnip seed must be no more than 12 months old to germinate readily.
Buying packets in the supermarket is often unreliable.
Be sure you have very fresh seed and sow using the method below.
Parsnip is similar to carrot in its growing conditions.
In a cool climate it is best sown in loosley worked deep fine soils.
Be careful not to over fertilise .
If the bed you are to use has received COF in a previous year, this will be sufficient for parsnip.
Over fertilisation leads to forking roots or hairy plants.
Like carrots, these plants develop long tap roots that later fill with nutrient before setting a seed head.
Sow the seeds anytime between mid October and mid January in a cool climate.
Early January seems to be the best time and I have found these sowings produce the most reliable keepers.
To develop its best flavour, parsnip needs to overwinter.
It will run to seed in the following Spring, so harvesting in late Winter, early Spring is ideal.
Seeds must be sown at 1.5 cm in rows 45 cm apart.
It is wise to assume that your seed will not germinate strongly and to thin out if necessary after germination.
Thinning needs to be at about 10 cm for best final spacings.
Keep sprinkling your sown seed with water until germination, or as for carrots cover with hessian for 10 days and keep moist.
Remove the hessian and continue to keep the bed moist for best results.
Sometimes mixing seed with compost aids germination as the compost seems to retain moisture more readily.
The roots will need less irrigation than other vegetables once they have sprouted.
One way to speed up the germination of parsnip & parsley seed is to allow the seeds to soak up moisture before they are planted.
Both parsnip and parsley seed are notoriously slow to germinate, but this speeds the process up.
To aid germination:
- Wet a towel & wring out the surplus water -Cover half the wet towel with a single layer of seed -Wrap the other half of the towel over the seed, so that it is covered -Keep the towel moist & at room temperature -Sow the seed 24 hours after wrapping in the towel-Once soaked, the seeds must be sown, as the process of germination will have started - Do not allow the seeds to dry out, as the germination will be upset -Do not keep any seed that is left over, for sowing later, as it will -probably not germinate once it has dried out.
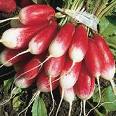
Radishes
Radishes grow best in the Spring months before the weather gets too warm. They are fast growers and the plants will emerge 4 days after sowing. Thin out to 2.5 cm spacings.
The plants should be ready for harvest in about 4 weeks..
Radishes are a good crop to sow in between rows of sweet corn plants, as the corn shileds the radish from the hot sun.
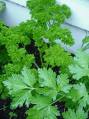
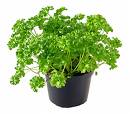
Parsley
The secret in growing parsley is to use fresh seed in cooler weather in early Spring.
Parsley seed germinates slowly and shoots best before the soil gets warm.
If sown in October it will sprout readily. If after this time the bed needs to be kept regularly moist to guarantee a reliable germination.
Parsley is normally a vigorous grower under most conditions and soil types.
Parsley is an insect pollinated biennial, so after over wintering and a short cropping period in early spring it will run to seed,
allowing you to gather new seed to sow elsewhere if you wish, or to allow it to re-seed for the new season in the same bed.
A garden without parsley is lacking I feel, as it is the most delicious herb being valuable as a garnish for most dishes and especially good in winter soups and with tomato in summer
.
We grow parsley outside our formal vegetable patch underneath our apple tree with a northerly aspect. That way the parsley always gets the sun, the shade of the apple tree falling on the south side
.JPG)
Beetroot
Beetroot is a great vegetable, pickled in salads and roasted with lamb and other dishes.
I usually grow 2 crops per year, sowing seed in Spring about October and then again in March.
Beetroot is not particularly fussy about the soil in which it grows and will produce a good crop even on reasonably heavy soils.
Naturally it grows better on a well drained friable soil.
In preparing the bed use about .4 litres of COF per square metre.
Dig this well into the bed and spread a thin layer of compost on the top.
Beetroot seed comes in clusters of 2 -3 seeds so you may get multiple germination from good seed.
Sow the seed in shallow furrows about 3cm apart and 30 cm between the rows.
Thin out to approx 10cm x 30cm spacings once the plants have started to grow well.
Water well and the beetroot will repay you by growing sizeable roots.
Baby beet can be harvested by thinning your plantings after about 6-7 weeks or as soon as the bulbs start to form on the beet.
Like carrots and parsnips, the beetroot puts down a tap root first and then stores nutrient in the bulb, mainly above the ground.
Coriander
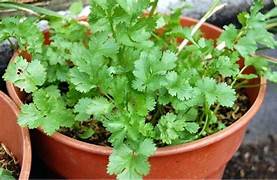
Coriander prefers consistent and reliable warmth, between around 15˚C and 22˚C. Temperatures outside this range can trigger flowering and seed production.
In Tasmania, aim to plant coriander from Autumn to early Spring.
Coriander can successfully grown in pots, (1 plant per 40cm pot,) and by letting the plant run to seed in the Summer, you can perpetuate your plantings. If you plant it later than spring, the hot weather will cause it to bolt and run to seed before you can use it.
Preparation:
Mix the soil with some sand to help it drain well: Coriander does not like wet feet! Apply COF when prpearing the soil. Plant your seeds 1cm deep into the soil and water thoroughly. The seeds should germinate within 7 days.Your plants will grow quickly and should mature within 50 days of being planted.If you want to harvest leaves before they fully mature, make sure that each plant has at least 8 leaves on it so that it will continue growing!
Growing Tips
1. Make sure you have deep and rich soil. Coriander develops long roots, so your soil will need to be able to support it. You can achieve this by adding manure and COF to your soil and planting in raised beds. 2. Choose a sunny spot. Coriander likes the sun, but it also needs well-drained soil. Be sure to water it regularly. 3. Keep your soil moist, but well-drained. Coriander isn’t like many other herbs; it requires a lot of water! Your soil should be moist at all times—but not soggy or mushy. If it feels that way, add some sand or gravel to make it drain better. 4. Choose the right kind of coriander seeds. There are two types: slow-growing and quick-growing. As a beginner gardener, it is advisable to start with quick-growing seeds. These tend to grow faster and are more forgiving. 5. Use a raised bed or containers when growing indoors. Coriander doesn’t like being crowded and if you’re planting more than one plant in a single container, make sure they are spaced at least 12 inches apart so they each have plenty of room to grow and flourish. When the leaves start to appear, trim them periodically so that they don’t form flowers and go to seed (which makes the leaves taste more bitter). 6. Remove any weeds. Coriander doesn’t do well with competition for sunlight and space from other plants like weeds—they’ll crowd it out and make it grow slower and smaller than it would otherwise.