Miscellaneous Vegetables

Sweet Corn
Even though sweet corn is the least productive vegetable per square metre, I wouldn't want a summer without any.
The taste of organically grown sweet corn freshly picked and steamed with a knob of butter for dinner is to die for.
Sweet corn needs to be grown in nitrogen rich soil with plenty of water.
Side dressings of blood and bone should be given weekly until the corn starts to send up its pollen stems.
It then needs a side dressing of sulphate of potash to ensure good flowering and even cob set.
Sweet corn is best grown in blocks of 3 x 4-8 plants in the home garden with 30 cm 30cm spacing.
Sow these blocks about 15 days apart from the beginning of November and you will have ripe corn by late January through to mid March.
The seed of most Sweet Corn varieties will not germinate evenly under a soil temperature of about 15 degrees Celsius, and the cobs will not mature until the corn has experienced a minimum number of heat units.
The genetic programming of sweet corn relies on heat summation to produce a cob of corn and so the earliest varieties will usually not produce until mid to late January in Tasmania no matter how early they are put in the ground.
Be wary of the packet claims that estimate the number of days corn takes to mature.
As I have said this is determined by heat summation.
In my garden I would estimate about 2300 HU in a summer which is enough to ripen most varieties without difficulty on plantings between November and early January.
Sow the seed at 30x30 centres about 2cm deep and water well.
Keep the bed moist throughout the germination period - about 7-10 days, and guard against snails on the emerging corn with snail bait.
Sweet corn Succession
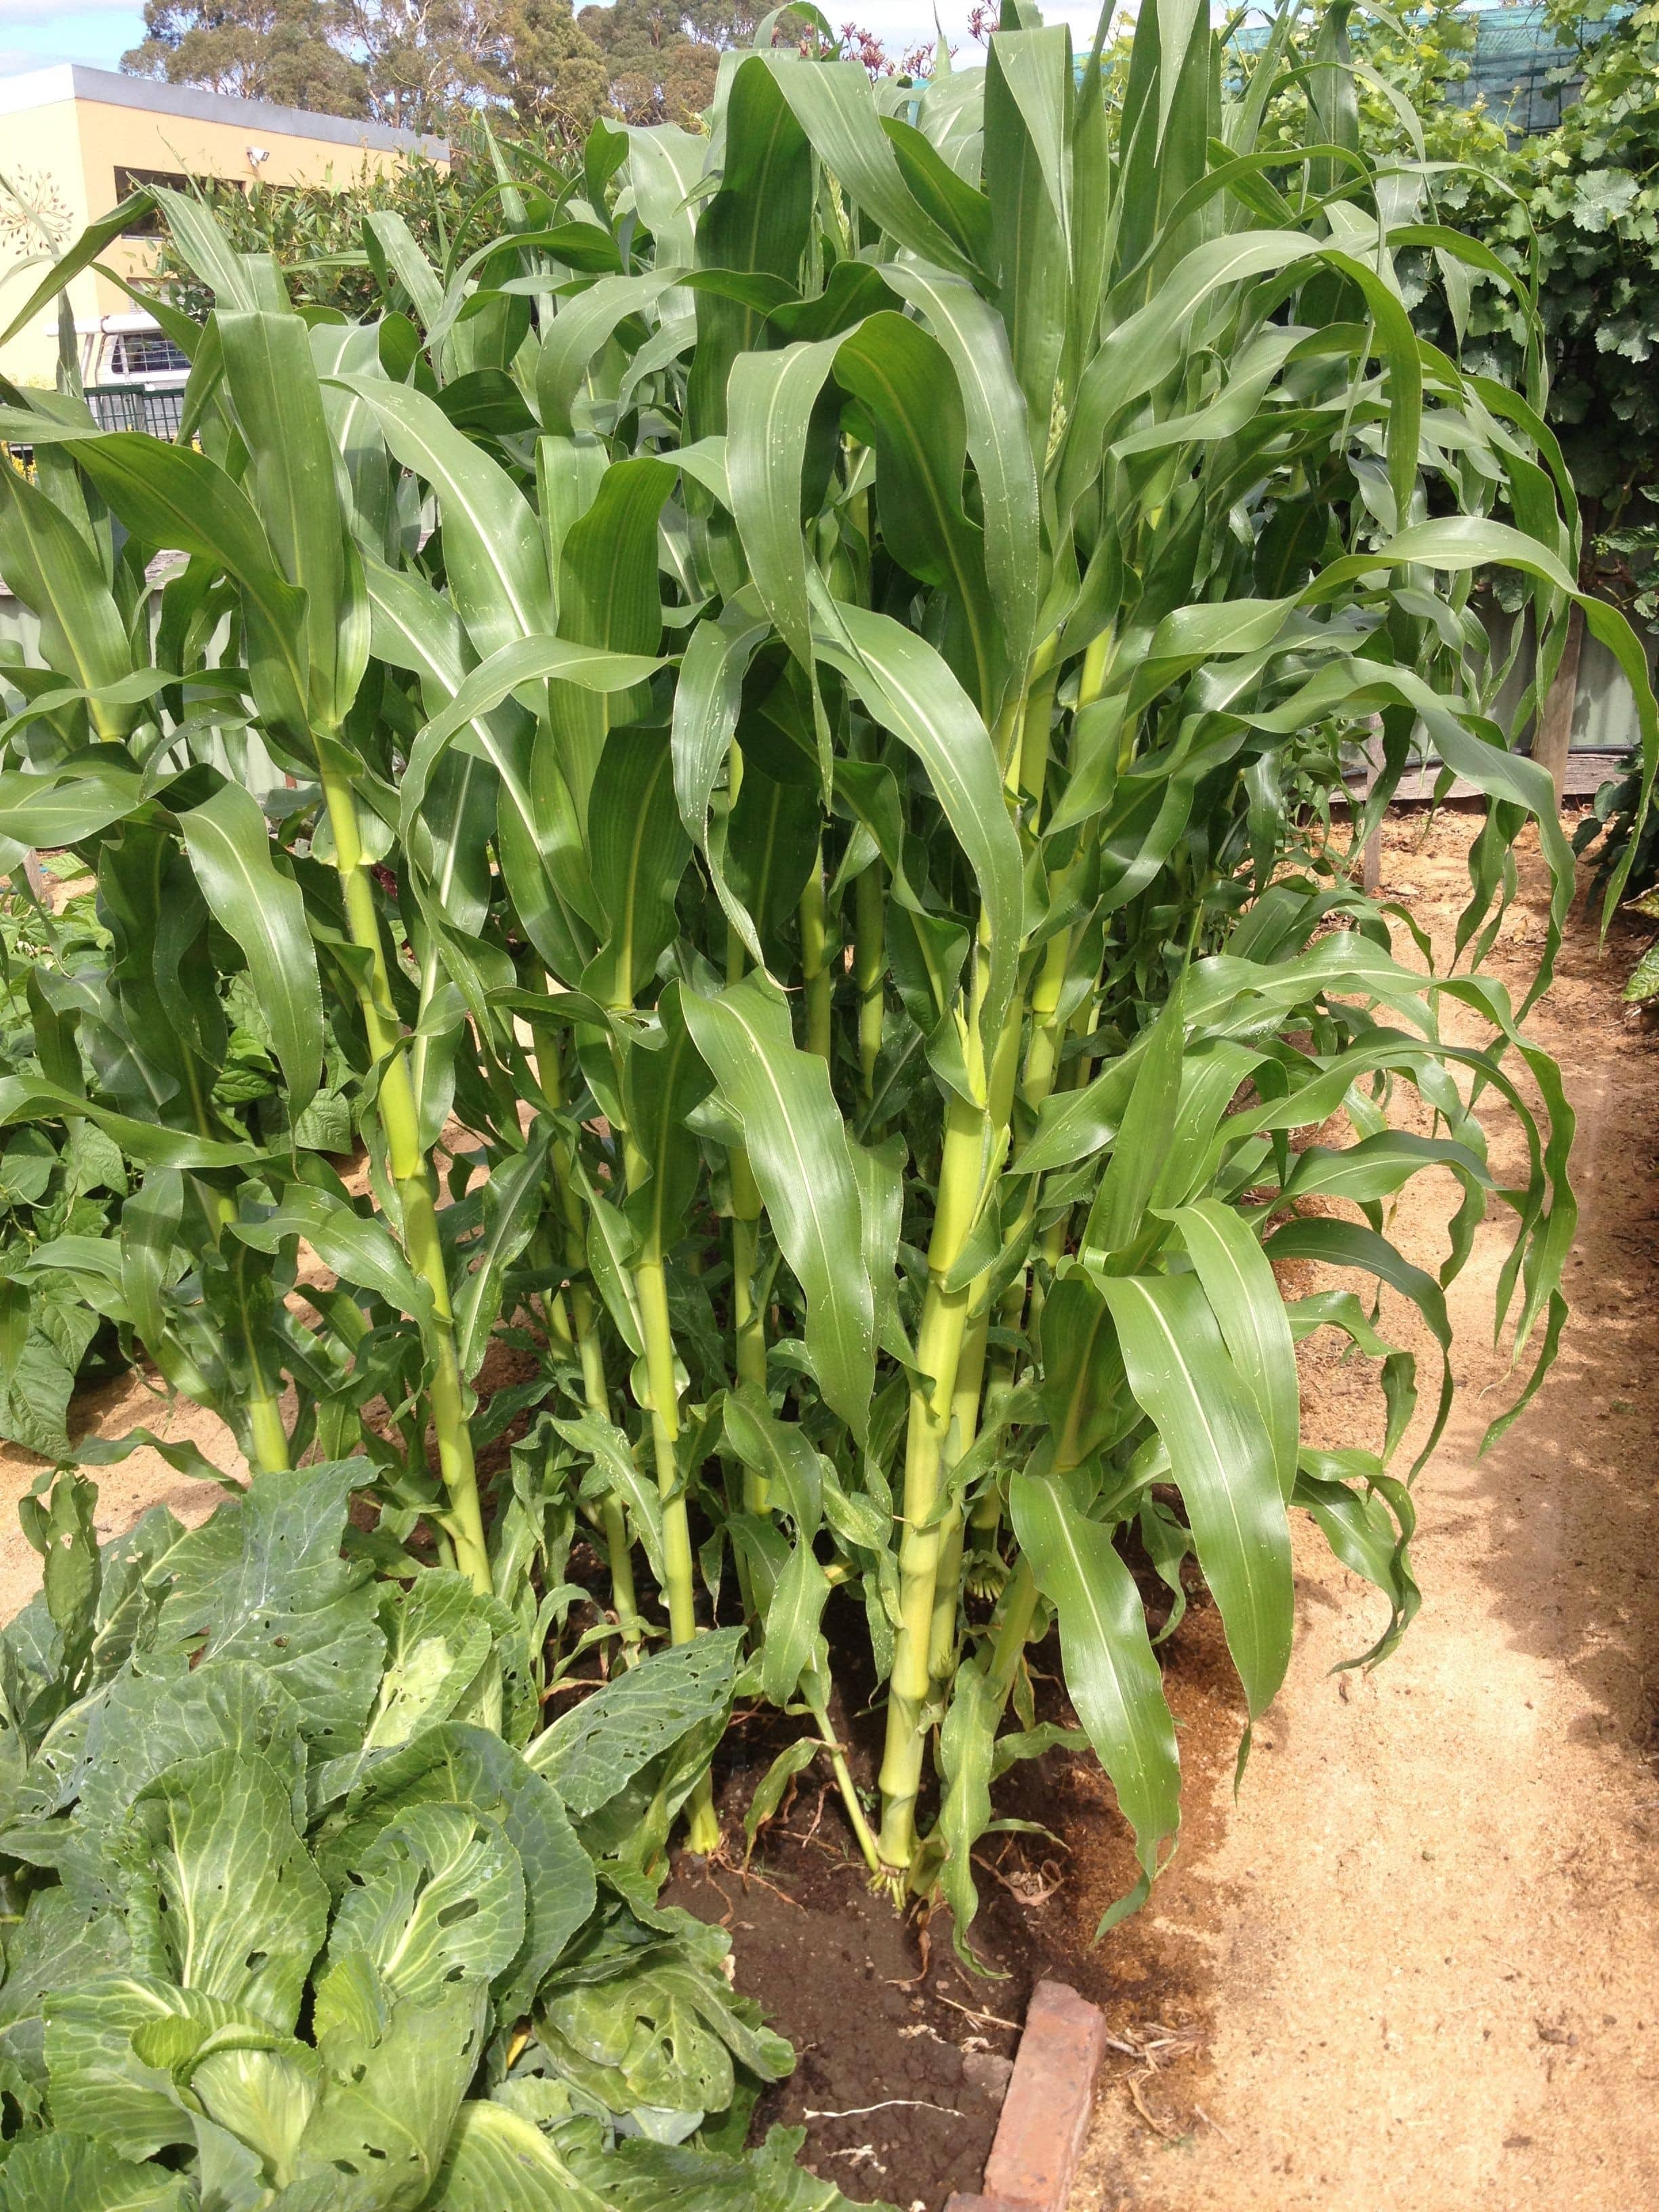
The photo left shows successional plantings of sweet corn in mid December.
The plants on the right were sown in early November and the plants in the foreground are only a week out of the ground.
I usually make sowings on October 15th ( inside -seedlings planted out when they have 2 true leaves- do not disturb the roots)
Transplant November 1st,
Second sowing Nov 30th
Third sowing December 15th.
Jan 1st - absolutely last sowing for cool climate.
In some years you will achieve poor pollination and end up with half filled cobs, but if you love sweet corn as much as I do you will try if you have the space.
When the plants start to tiller ( ie; grow side shoots from the base), side dress with blood and bone to provide extra nitrogen every week or so.
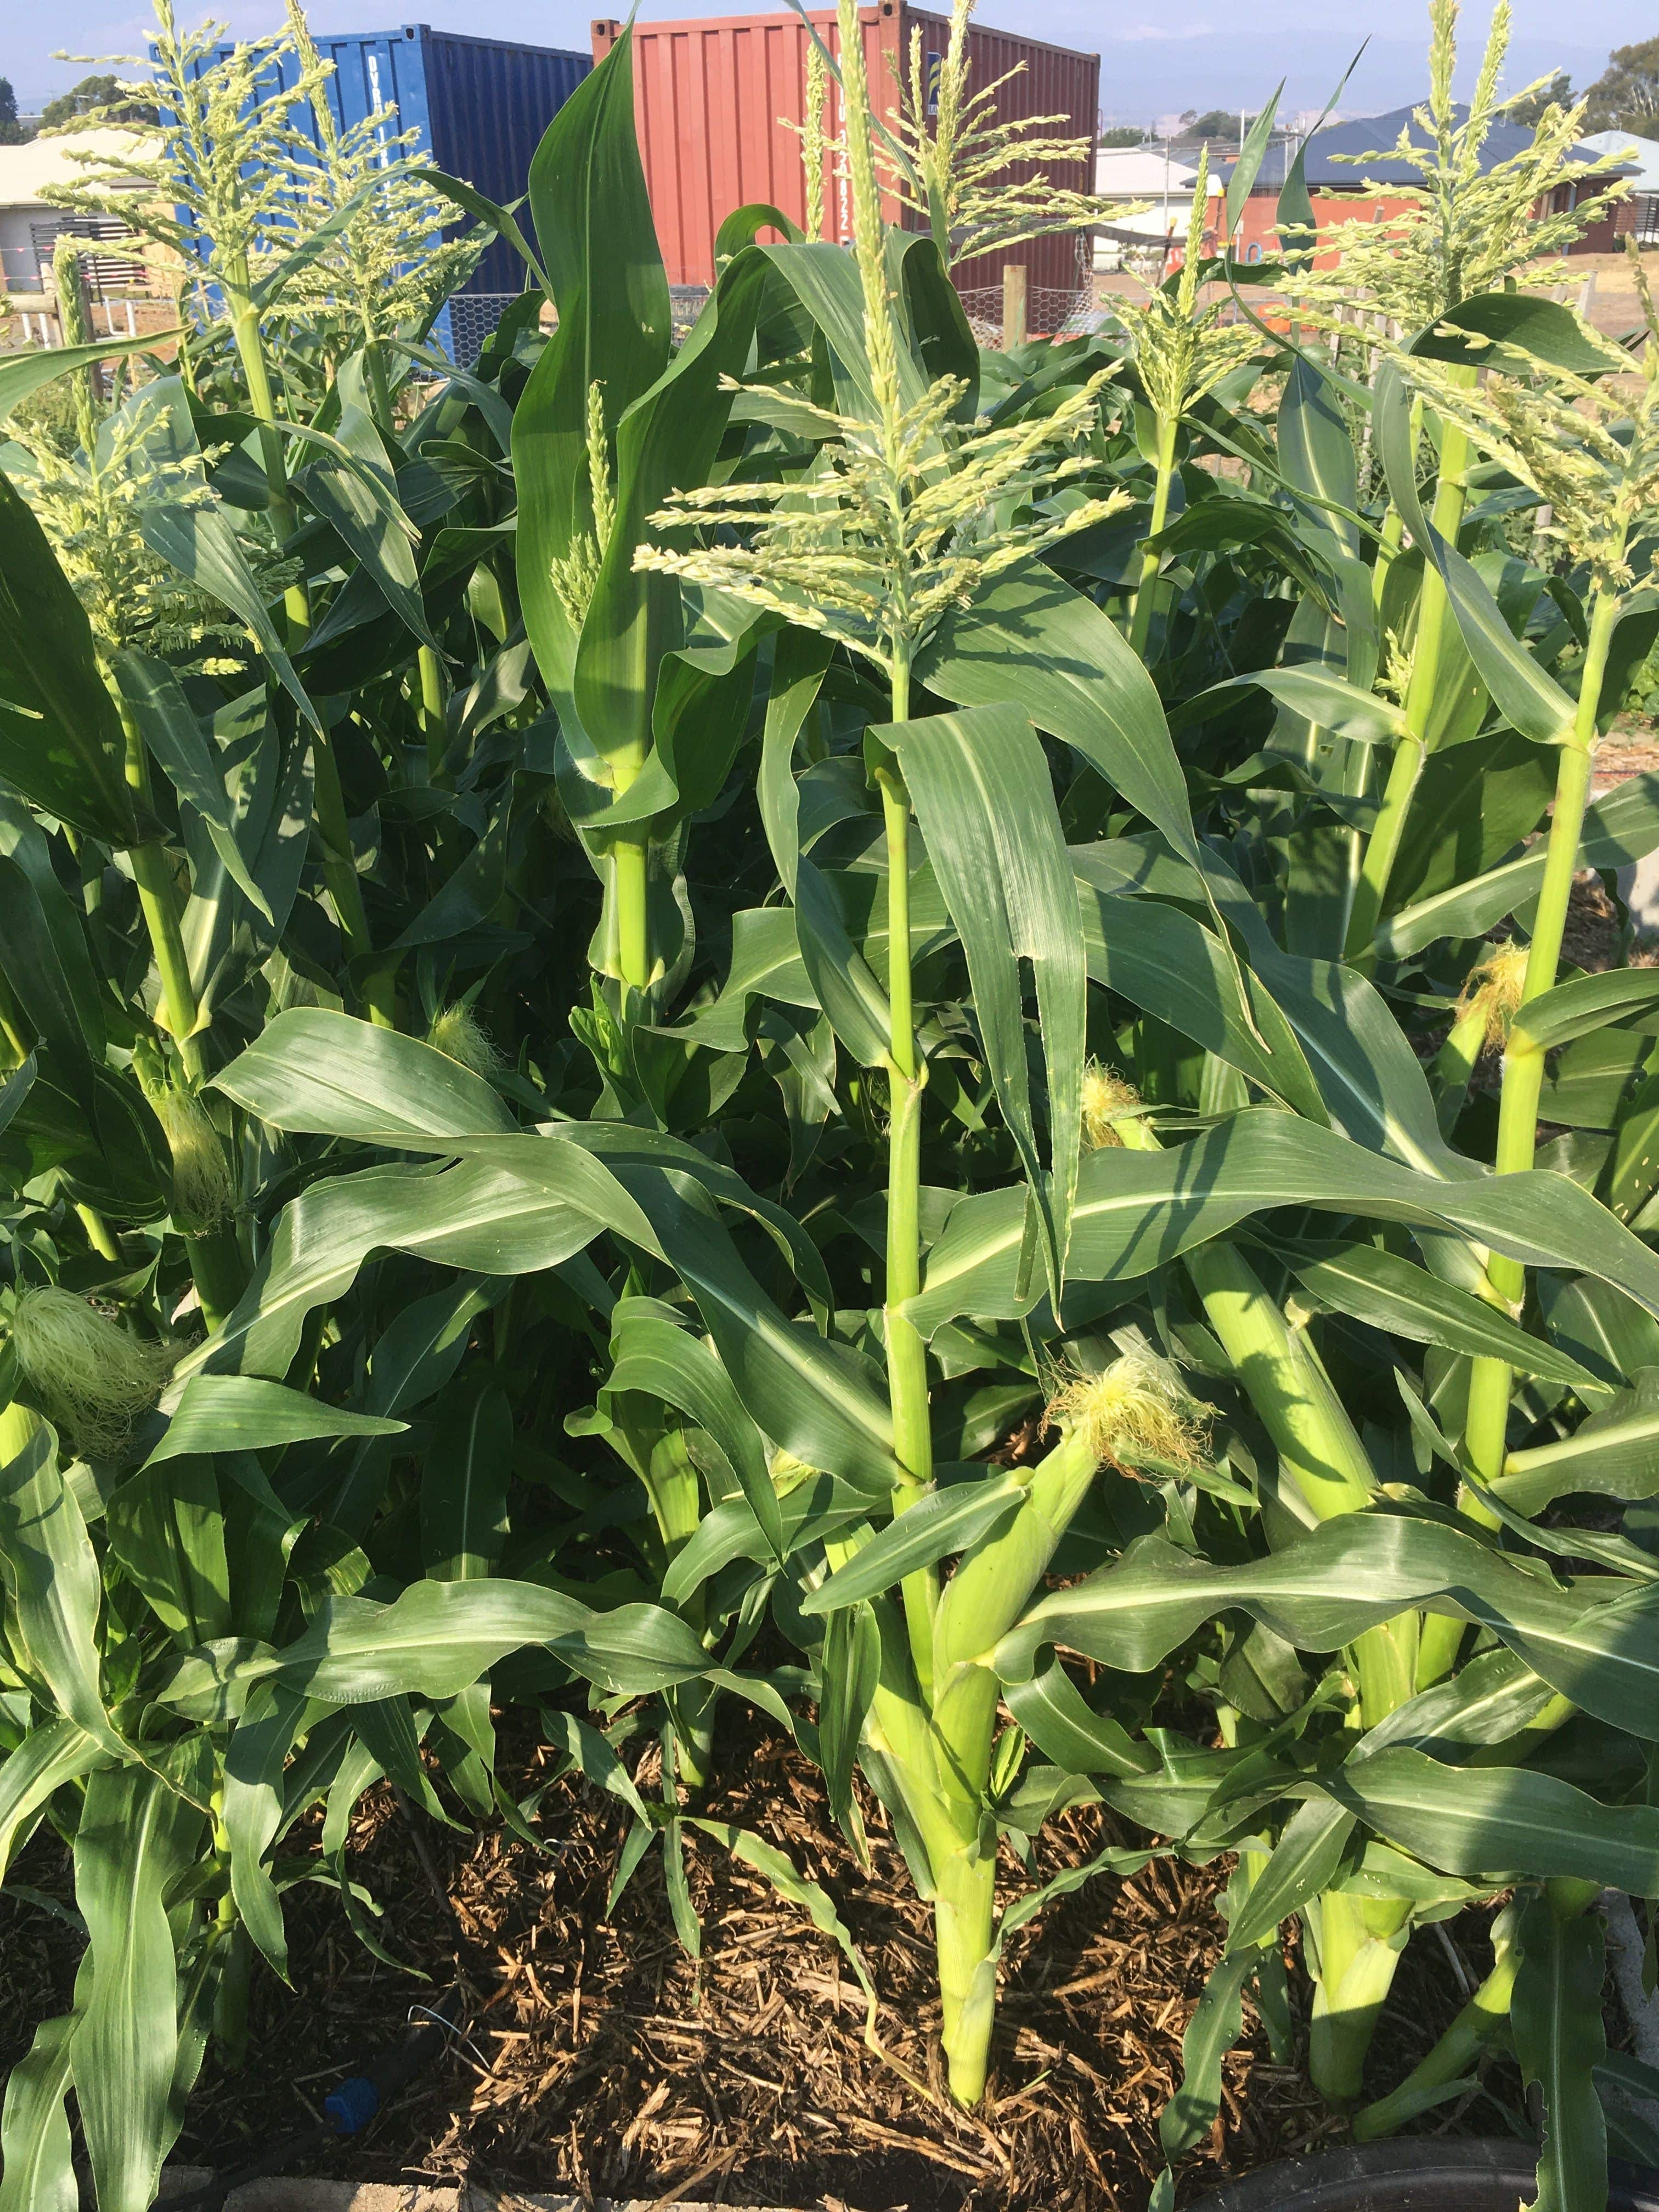
Start to apply side dressing of sulphate of potash in early January to the first sowing to promote strong production of silks and pollen.
Pollination is by wind, so it is important to plant sweet corn in blocks of 15-20 plants minimum to guarantee good pollination.
I get my seed from Waratah in Launceston. It germinates readily when soaked overnight in Seasol 5ml to 200ml of water. Plant after 24 hours immersion.
It produces 2-3 nice sized cobs per plant and so over 2 weeks a dozen plants will adequately feed two people.
Sweet corn can be picked when the silks turn dark brown.
You can check the ripeness by peeling back the layers of leaves to expose the cob.
It should be picked when the colour of the kernels is cream.
Do not wait for it to go yellow as the sugar in corn turns to starch quickly and leaves a the taste of the cob chalky.
If the kernels have turned yellow, the corn is past its best.
I have had very few pests in Tasmania for sweet corn.
When I grew this in southern NSW commercially on a small scale for a couple of years,
I found that heliothis caterpillar was sometimes a problem in the developing corn cobs.
I have occasionally experienced some eating of the emergent leaves but I am unsure what has eaten them. The plants usually grow strongly after emergence because of the COF I apply.
I suggest you feed your emergent seedlings with side dressings of COF to maximise their growth and therefore minimise their susceptibility to insect attack.
Cultivation
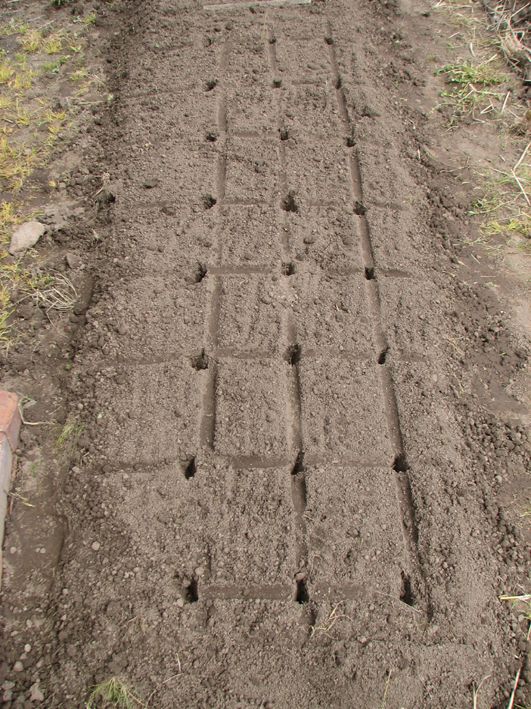
When preparing ground for sweet corn, I prepare blocks for 15 plants maximum in blocks of 2 metres x1.2 metres - my normal bed width. 45 plants for the season yields approx 50 cobs of corn.
This allows a length of 2 rake lengths which I use to mark out my spacings. The image on left shows the spacings 30x30 which allows 3 plants across the bed and 5 plants in the length of 2 metres.
I usually prepare my sweet corn bed by planting an over wintering green manure crop , such as broad beans, which I dig in in Septemberleaving a month for it to rot down and leave a nitrogen ready supply for the young corn plants.
Because the green manure plants fix their own nitrogen in the soil, the young corn plants will have plenty of nitrogen to get away to a good start.
Drop the seeds into holes of 2.5 cm depth and cover.
Water well and keep moist until the shoots emerge- about 10 days depending on temperature.
Remember that corn will not readily germinate in soil temperatures under 15 degrees centigrade.
For this reason I pre-sow my first crop in punnets inside about late September.
I keep the soil warm indoors and apart from unseasonal cold snaps, the seed usually sprouts at about 10-14 days.
Once the seedlings develop true leaves , I transplant these to open spacings in the garden, disturbing the roots as little as possible.
The early advantage of growing these plants inside is lost if there is a significant setback from the transplanting.
Bear in mind that I have already impressed that heat summation is responsible for the production of cobs, so really early planting will not produce any real advantage.
I make 3 successional plantings depending on the season as outlined above.
We are usually plentiful in corn between late January and early April with gifts to neighbours and other visitors to the garden.
The success of this plant is in its feeding and the timing of its harvest.
Worth growing and fussing about to get a sensational food taste when harvested.
As soon as the cobs have been harvested, cut the stalk from the plant and chop for compost.
It is far easier to compost when the plant is green. I then fork up the roots and chop for compost.
Once your sweet corn is out of the ground, it advisable to sow a green manure crop in the Autumn months to replenish the bed with nitrogen.
This can be dug in prior to the following season when tomatoes and other Solanums plants would occupy this bed.
Sweet corn is very hungry and depletes the nutrients in its soil considerably.
A green manure crop dug in will help to replace the nutrients that have been used.
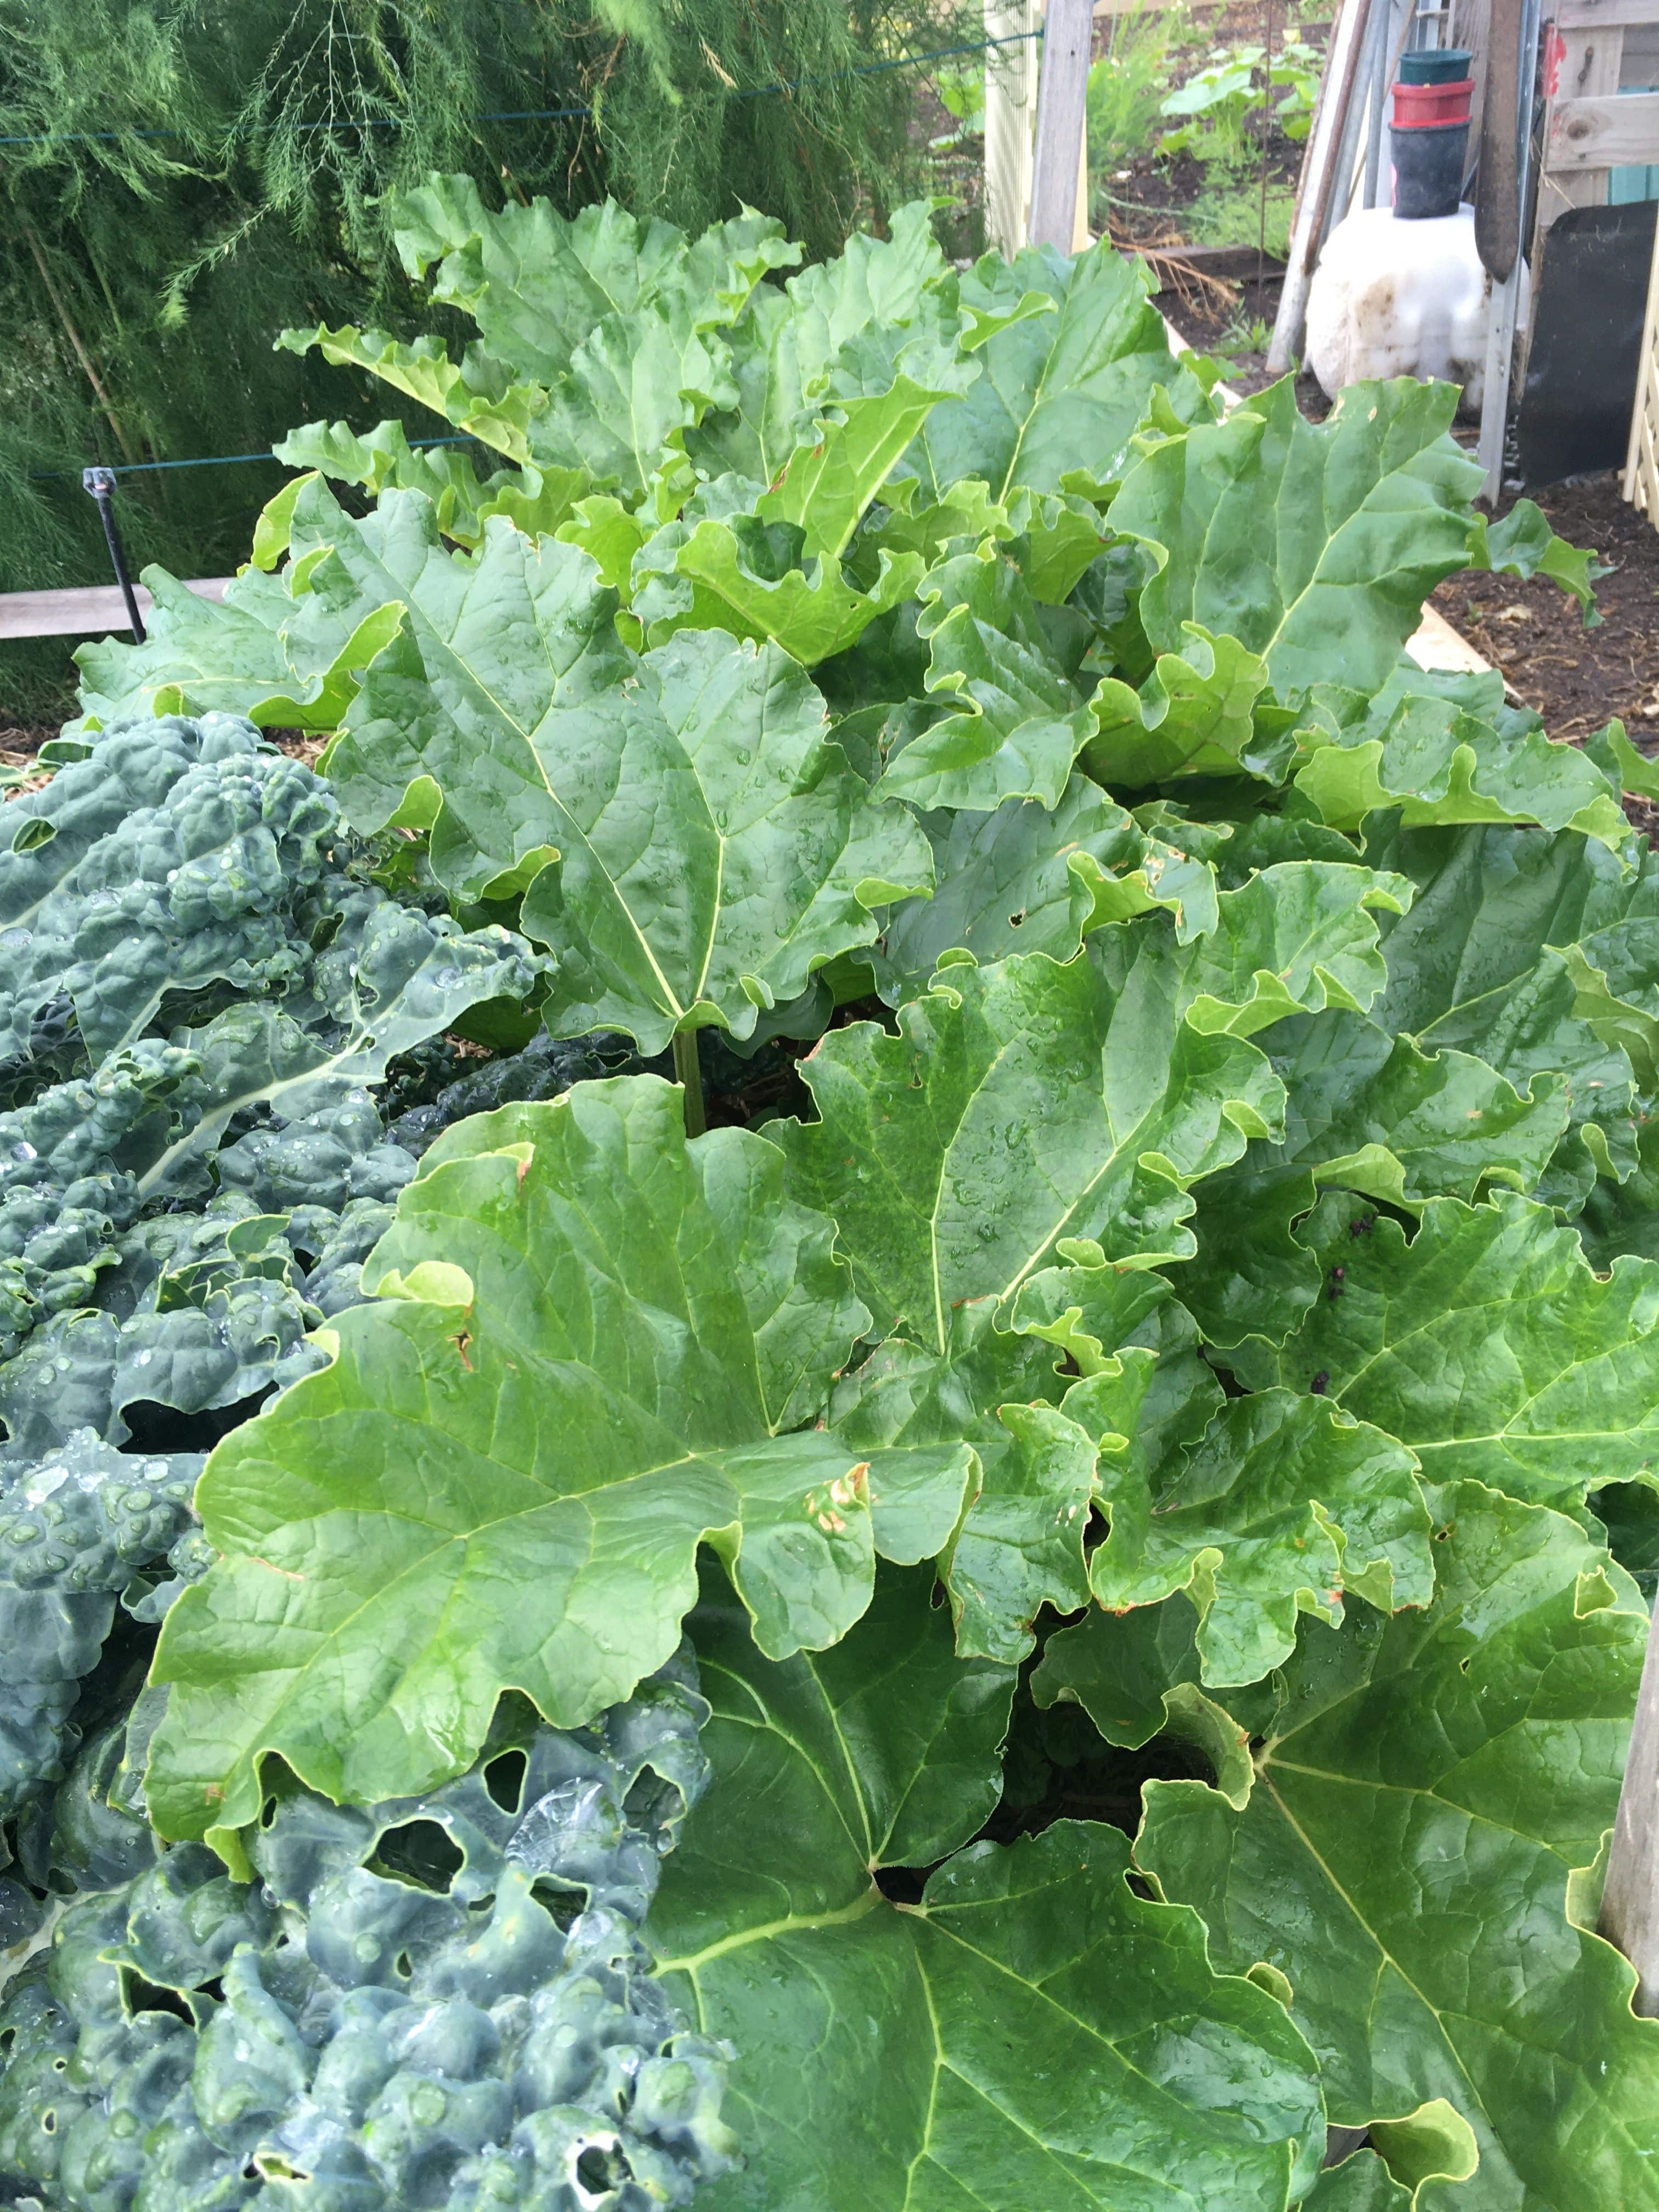
Healtrhy rhubarb alongside snail and slug enjoyed silverbeet.
Rhubarb
Rhubarb is technically not a vegetable, but as a reliable food source it cannot be missed in the home garden. Rhubarb is trouble-free to grow and a reliable sorce of breakfast or dessert supplement to any table.
Rhubarb can be purchased from plant stores or reliably propogated from split plants within one garden to another.
The best time to transplant it is in winter when it is dormant in some varities, or not so active in others.
It requires a yearly dose of COF in August or September, to allow a harvest of stalks throughout the warmer months of the year.
I do not harvest mine during the months of June, July and August to allow the plants to build strength over the cooler months.
The leaves contain oxalic acid, which, in significant quantities is toxic to most animals, including humans. So don't be tempted to use the leaves.
It is rarely affected by garden pests ( see contrast opposite).
It sometimes suffers from a leaf spot disease in the cooler weaather:
Rhubarb Leaf Spot
Rhubarb leaf spot is a common fungal disease caused by the fungi Mycosphaerella pontederiae and Ramularia rhei. It primarily affects the leaves of the rhubarb plant.
Symptoms: Infected leaves develop small reddish-brown spots that gradually enlarge over time. These spots may have a grayish center and can coalesce to form larger irregular lesions. Severe infections can cause defoliation and weaken the plant.
Treatment: To manage leaf spot, remove and destroy infected leaves as soon as symptoms appear. Avoid overhead watering, as wet foliage provides favorable conditions for fungal growth. Applying a fungicide labeled for use on rhubarb can also help control leaf spot, following the instructions provided by the manufacturer.
Recipes
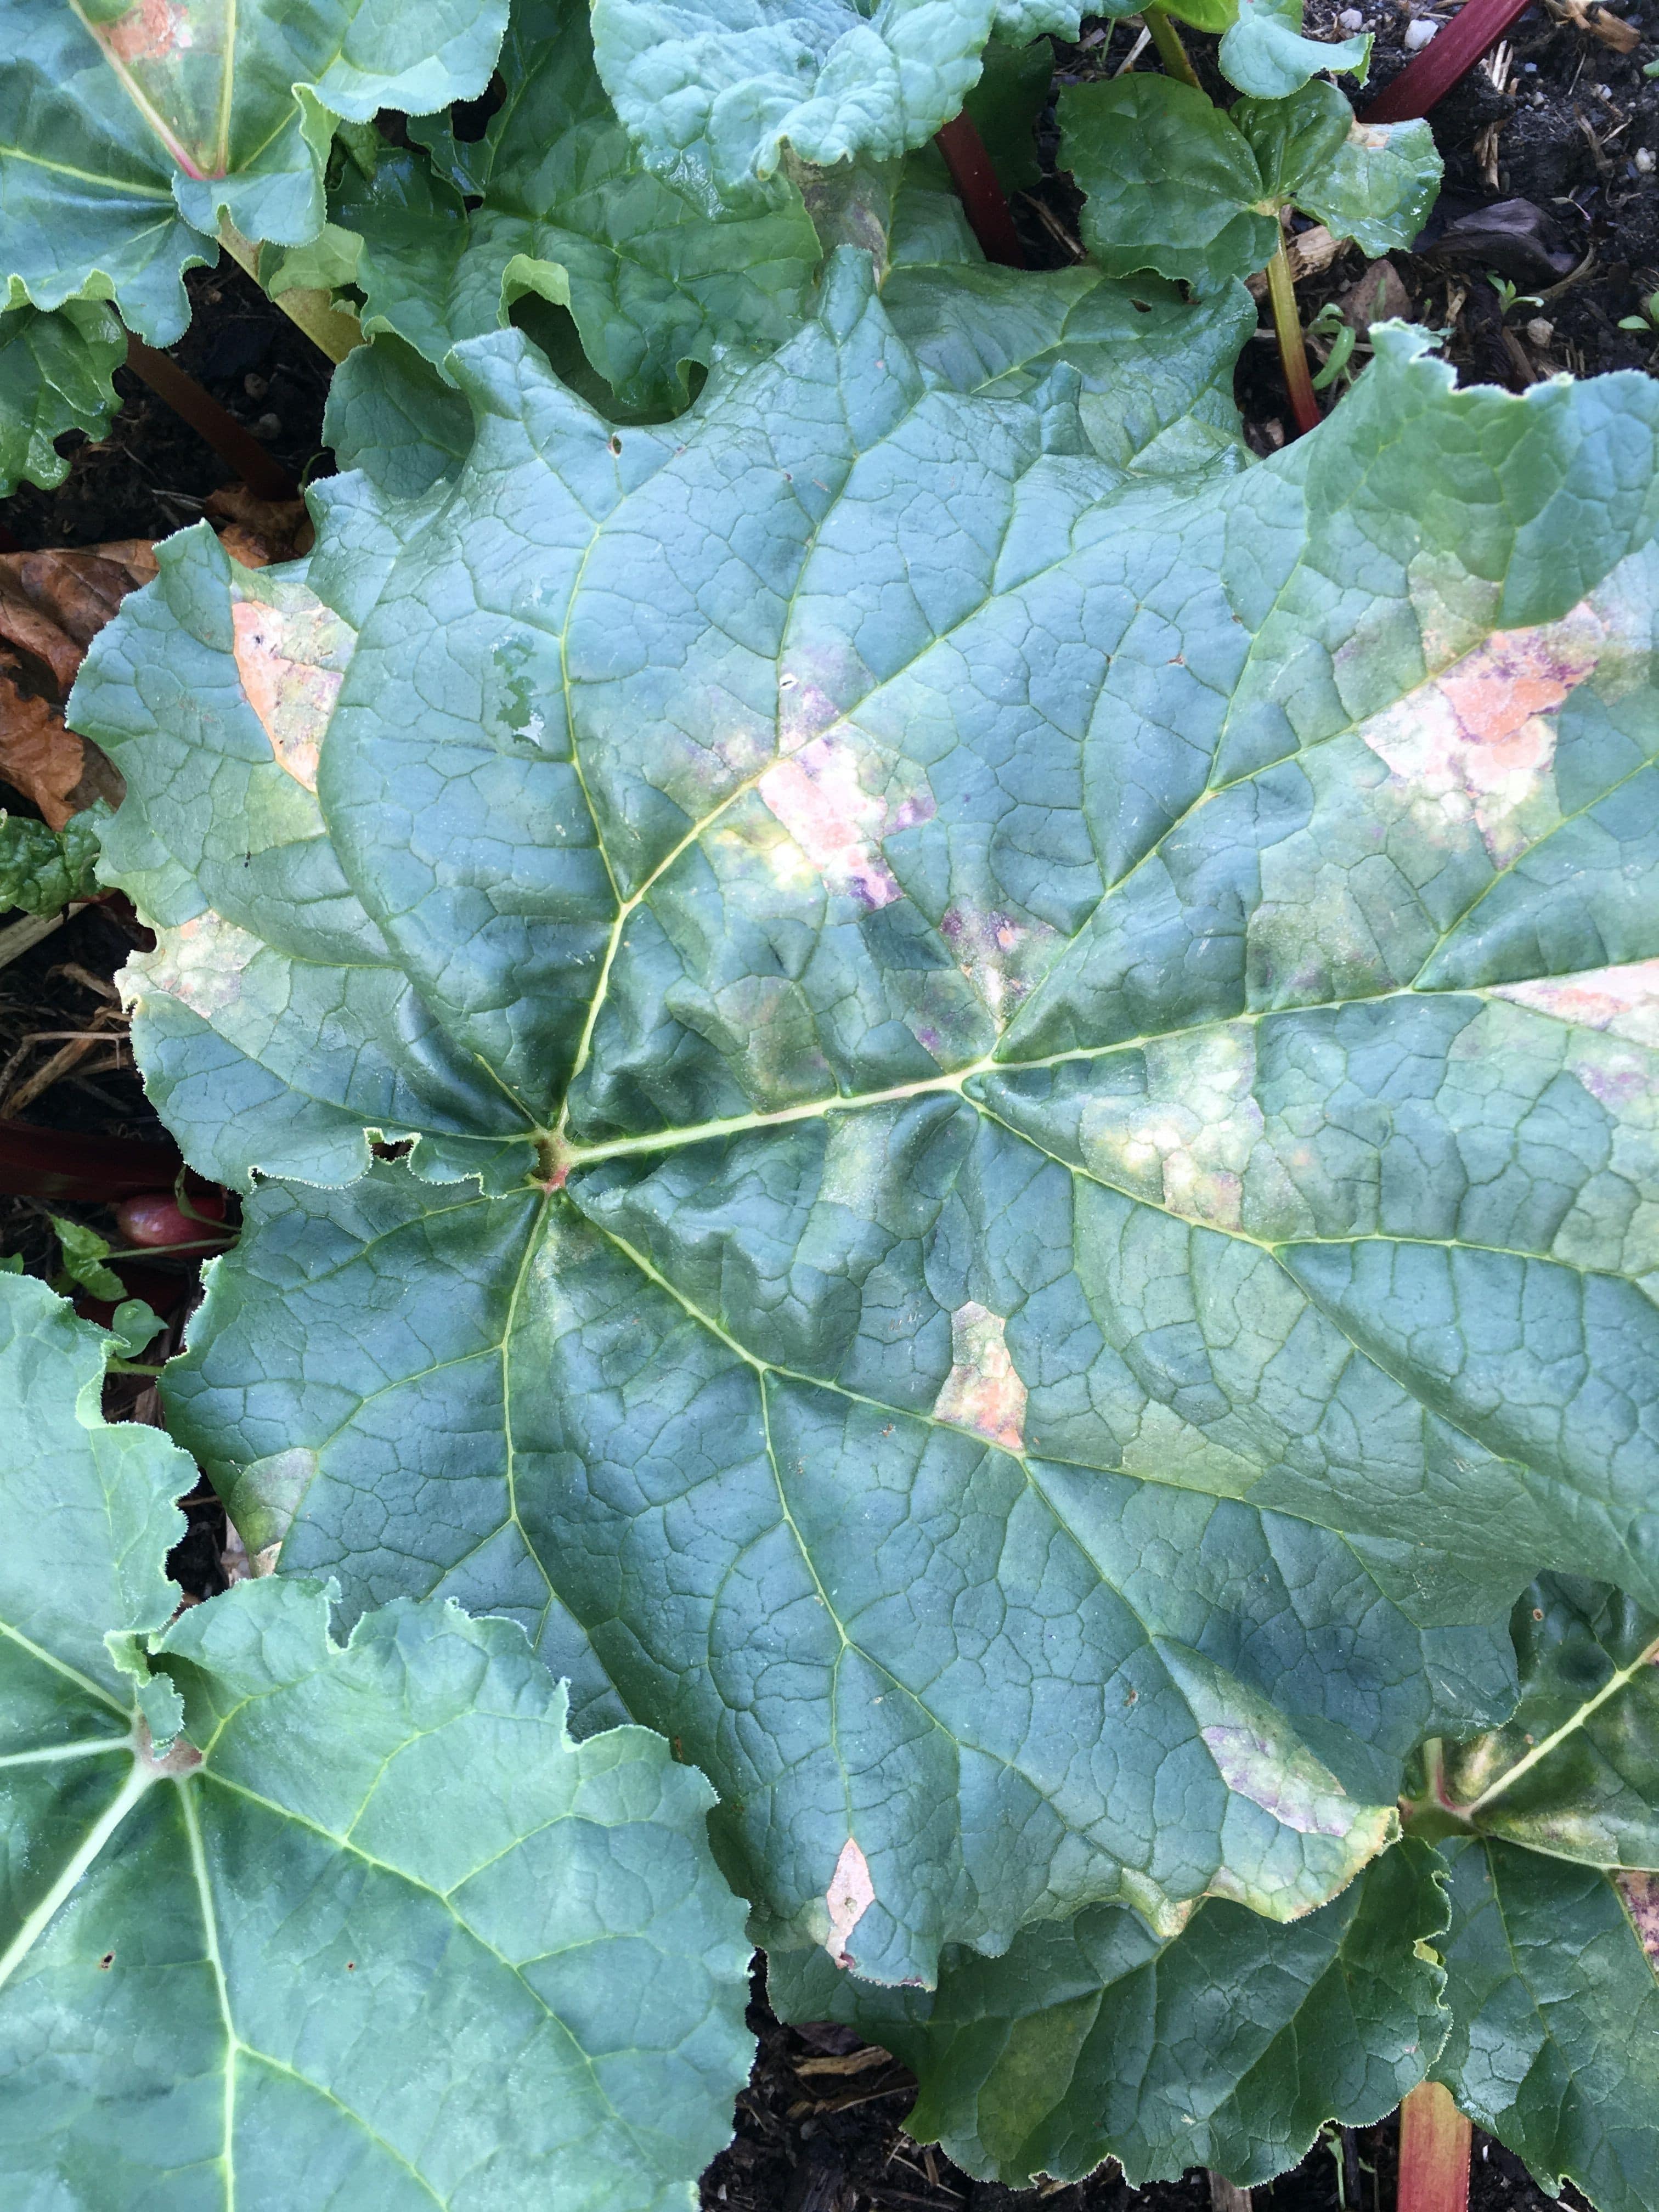
Rhubarb leaf spot fungal disease.

Asparagus
Asparagus takes a few years to produce from seed or from crowns attainable at a nursery. It requires a deep soil prepared with COF into which either seed or crowns are planted.
Seed:
Asparagus seed is fine and will take about 14 days to germinate. It will take about 3 years to grow enough to harvest when the new shoots emerge in early Spring.
Crowns:
Plant crowns 20-40 cm apart in well prepared deep soil. The asparagus shoots grow in spring. Harvest the shoots which are 1-2 cm in diameter. Leave the rest to grow into leaf ferns to about 1.5 mtrs tall. You will need to fence or support these with stakes and string to prevent wind damage over summer. These will provide sugar to the crop to grow spears next year.. In the Autumn the female ferns will be covered will red, poisonous berries.
I remove these plants as the male plants provide better spears more reliably.
Leave the ferns to die down in autumn before cutting of the dead ferns and mulching.
In August, I give the asparagus a good covering of compost and COF and cover with pea straw. The spears start emerging in late August and can be cut below ground level until late November. Consistent watering in the summer months will reward you with healthy grow of the fern and good quality spears in the next Spring.
Artichokes
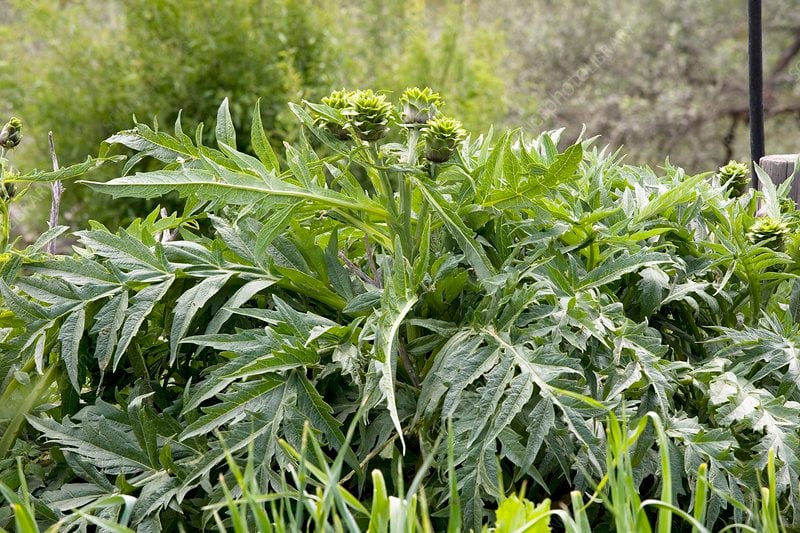
There are two unrelated plants called artichoke – Globe Artichokes – Cynara scolymus and Jerusalem Artichokes – Helianthus tuberosus.
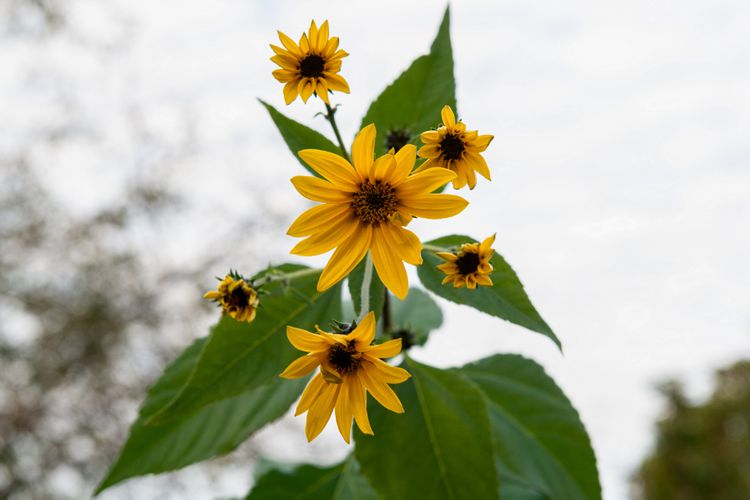
Different parts of the two plants are eaten. The Globe Artichoke is a member of the Asteraceae family, is a thistle and the flower bud is eaten. The Jerusalem Artichoke is a sunflower and the tuber is the edible part. As well as providing food, globe artichokes are attractive plants in the garden.They originated in Mediterranean regions and Central Asia so will grow in many parts of Australia including Tasmania.
Because they are extremely hardy and perennial, they are a useful addition to gardens where you want minimal chemical inputs..Growing to 1 – 1.5 metres in height and width, they make a stately feature and because they are perennial, a spot needs to be chosen that allows full advantage to be taken of the appearance of their graceful arching leaves. Buds grow on the ends of long flower stalks and may be green, bronze or purple according to the variety.
Planting schedule
Tasmania: September – November
Position
Globe Artichokes prefer a sunny spot with plenty of space and well-drained soil. Because they produce 4 – 6 flower heads in their first year and 10 – 12 in the second year if grown from an existing plant, you will only need 1 or 2 plants per adult in the house. If growing from seed, flowers won’t form until the second year. They can be grown in pots but make sure the pot is about 1 metre wide and at least 30 cm deep. Raised beds are perfect for them.
Soil and fertilisingThey love a rich, well-drained soil. If you see their outer leaves drooping, it will be because of waterlogging in winter or drying out in hot summers. Plenty of compost in the soil is important in preventing both extremes as it helps drainage in winter and retains moisture in summer. Making sure the soil is prepared properly at planting time is vital for successful growth in subsequent years.Flowering and harvesting
The first buds appear in early spring and continue through to early summer. Flower buds should be harvested before they open and when the stem below the bud is still pliable. They should be in the shape of a globe (that’s where they get their name from!). To pick the buds use a sharp knife to cut the stem leaving a few centimetres of stalk attached.
Propagation
They may be grown from seed, shoots or suckers. Plants can be kept for several years and each year suckers will form at the base of the stems. They should be cut back to 30cm high in autumn. In winter they are pruned with the four strongest shoots left to flower the following spring.
Use as decoration
If flower heads are left on the plant and allowed to dry they are attractive additions to dried floral arrangements. The seeds seem to be infertile and don't cause a problem if left.
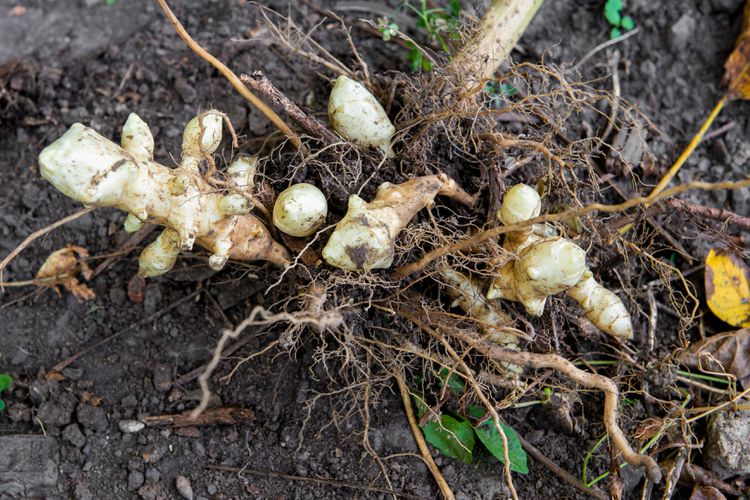
Jerusalem Artichokes
The best way to grow Jerusalem artichokes is by planting the tubers in early spring. They should be spaced around 12 to 18 inches apart and planted no more than 5 inches deep. Make sure you don't plant too deeply as this can result in a poor harvest. The "eyes" should be facing upward, and the tuber pieces should weigh at least 50 grams—smaller pieces can also result in a lesser yield. The soil should be moist but not saturated. Harvesting Jerusalem Artichokes
You can harvest sunchokes anytime from October to December, but Jerusalem artichokes are much sweeter and more flavorful after a light frost or two. They usually take around 110 to 150 days to reach maturity. Add a thick (12 inch) layer of mulch after your first frost to extend your harvest. This will keep your ground from freezing, buying you a few more weeks to harvest your sunchokes. If you harvest later in the season, your sunchokes might taste sweeter, but they won't contain as much of their beneficial inulin dietary fibers.
The roots can be located and harvested with the assistance of a fork or hand rake—just be careful not to damage tubers. Mechanical potato harvesters can be used, but they may need to be modified because of the smaller size of Jerusalem artichokes.
Artichokes can be stored in your refrigerator for around 10 days or in a root cellar with temperatures around 0 degrees Centigrade for a few months.
Freshly harvested, Jerusalem artichokes can be used in salads, or they can be cooked like potatoes. They taste similar to water chestnuts. Don't eat too many if you wish to avoid a flatulence problem. PruningJerusalem artichokes plants can easily grow to reach 10 feet in height. If you want all the energy to go into tuber production, cutting them down to around 4 feet during the middle of the summer is advised, as is removing flower stalk before blooming.Propogation Jerusalem artichokes are readily propogated from tubers. Give some thought where you plant them , as once established they are very persistent.